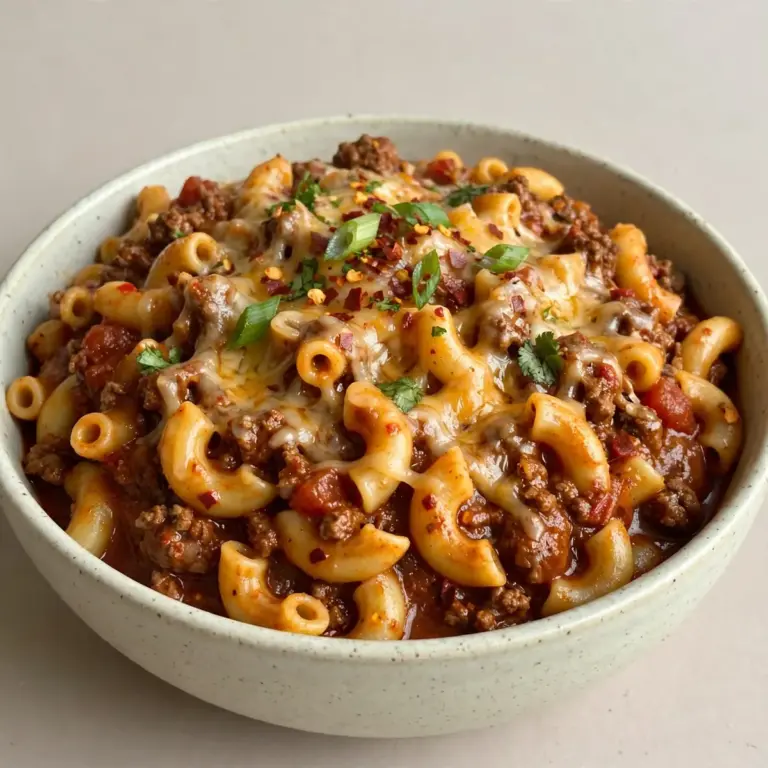
One-Pan Cheesy Beef Taco Skillet
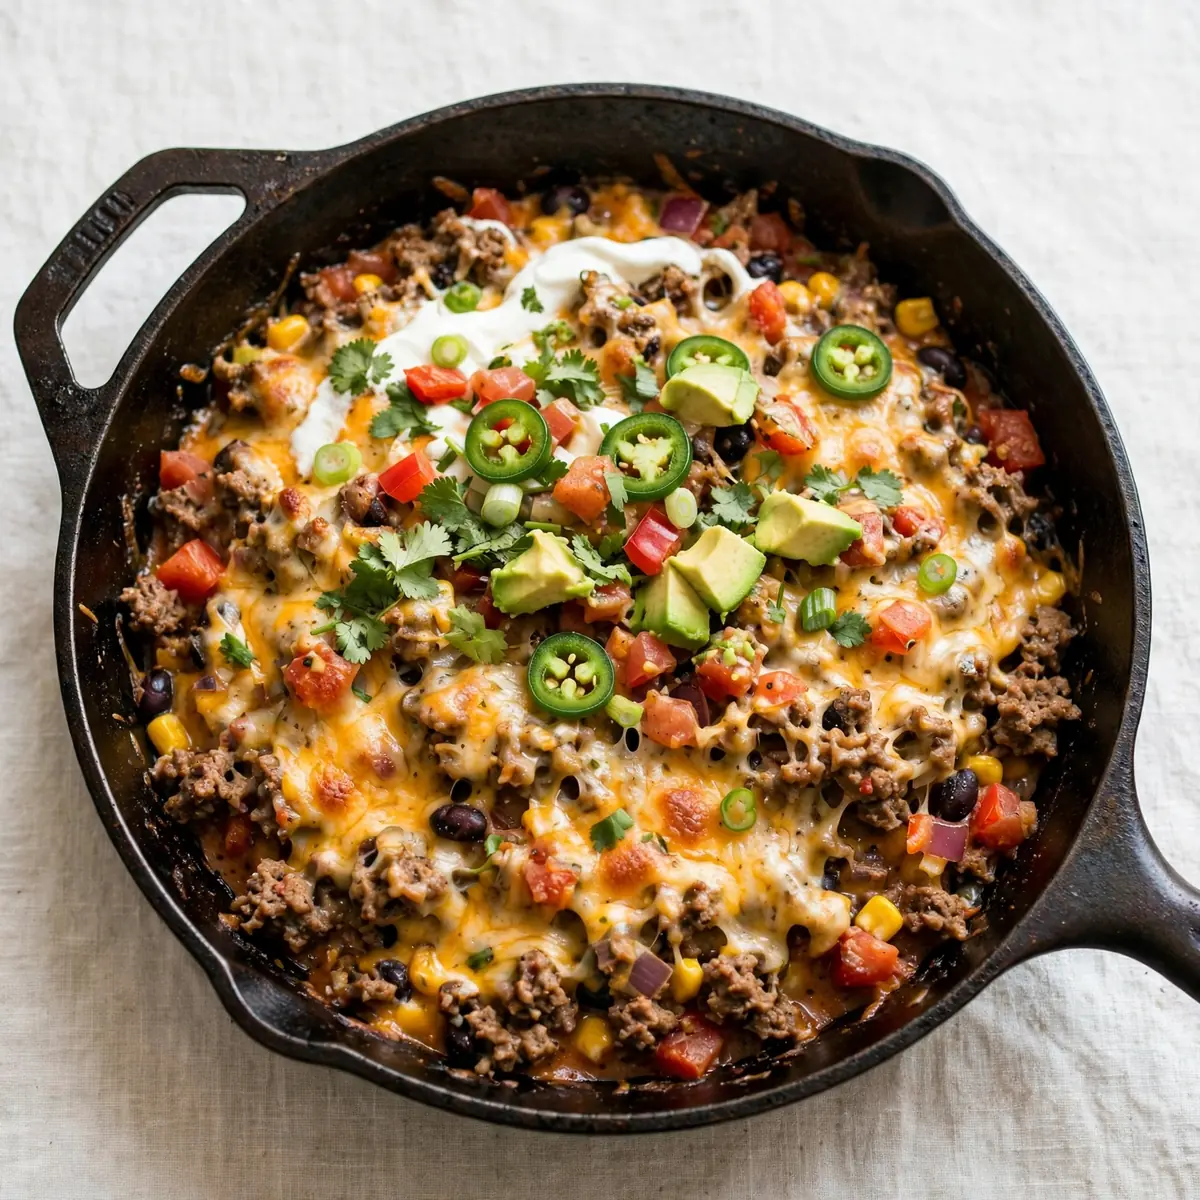
There are few things quite as rewarding as the slow, deliberate rhythm of a Saturday afternoon spent pottering in the kitchen, with the promise of a deeply satisfying meal at the end of it. This One-Pan Cheesy Beef Taco Skillet is my go-to project for those days; it fills the house with the warm, smoky scent of cumin and chilli, and the final, glorious sight of a bubbling, golden cheese crust is a meditation in itself. Let’s take the time to build this together.
Recipe Overview
- Prep Time: 15 minutes
- Cook Time: 30 minutes
- Total Time: 45 minutes
- Servings: 4 generous portions
- Difficulty: Easy (but with a mindful, slow approach)
Why You’ll Love This One-Pan Cheesy Beef Taco Skillet
- It’s a sensory anchor for a slow weekend. This isn’t a recipe you rush; it’s one you savour. The sizzle of the beef, the bloom of the spices, and the stretch of melted cheese create a moment of pure, grounding comfort.
- The texture journey is unmatched. You get the tender, seasoned mince, the slight bite of fresh peppers, the creamy melt of cheese, and the soft, pillowy rice all in one spoonful. It’s a study in contrasts.
- One pan means more time for you — as in our Quick Weeknight Sheet Pan Smoked Turkey Sausage and Veggies. While the flavours meld and the cheese browns, you have a clear twenty minutes to put your feet up, pour a tall glass of something cold, and just breathe. The clean-up is a five-minute affair.
- It builds flavour layer by layer. We don’t just throw everything in at once. We brown the beef properly, sweat the aromatics, and toast the rice—each step adds a new dimension to the final dish.
- It’s endlessly adaptable to your larder. I’ve been making this for over 5 years, and it never disappoints. Whether you swap the beef for turkey or add a handful of sweetcorn, the core philosophy of a cosy, cheesy skillet remains beautifully intact.
Ingredients You’ll Need
- 1 tablespoon olive oil
- 500g beef mince (15-20% fat is ideal for flavour)
- 1 large onion, finely diced
- 3 cloves garlic, minced
- 1 red bell pepper, diced into small cubes
- 1 green bell pepper, diced into small cubes
- 2 tablespoons tomato purée
- 1 tablespoon ground cumin
- 2 teaspoons smoked paprika
- 1 teaspoon dried oregano
- ½ teaspoon chilli flakes (optional, for a gentle warmth)
- 400g can chopped tomatoes
- 250ml beef stock (made with one stock cube is fine)
- 200g long-grain white rice, rinsed until the water runs clear
- 200g grated mature cheddar cheese
- Salt and freshly ground black pepper, to taste
- Fresh coriander, roughly chopped, for garnish
Tip: Rinsing the rice is a crucial step you shouldn’t skip. It washes away the surface starch, preventing the skillet from becoming a gluey, stodgy mess and ensuring each grain stays distinct and fluffy.
How to Make One-Pan Cheesy Beef Taco Skillet
- Brown the beef with patience. Set your large frying pan or skillet over a medium-high heat and add the olive oil. Once it shimmers, add the beef mince. Break it up with a wooden spoon and let it sit, undisturbed, for a good 3-4 minutes. You want to hear a fierce sizzle and see the underside turn a deep, nutty brown. Only then should you stir. This browning, called the Maillard reaction, is the bedrock of all the flavour to come. Stir and cook until no pink remains, then tip the mince into a bowl and set aside.
- Sweat the aromatics until translucent. Lower the heat to medium. In the same pan, with the residual fat, add the diced onion. Stir it around, scraping up any browned bits from the bottom. Cook for 5-7 minutes, until the onion turns soft, glossy, and translucent. The smell will shift from raw to sweet and savoury. Add the garlic and both bell peppers, and cook for another 3 minutes. The peppers should soften but still hold a little resistance, their colour brightening.
- Bloom the spices in the pan. Add the tomato purée, ground cumin, smoked paprika, dried oregano, and chilli flakes if using. Stir constantly for one full minute. This step is non-negotiable. You will smell the spices ‘waking up’—the aroma will become potent, earthy, and intoxicating. If the paste begins to stick, add a splash of the beef stock to keep it moving.
- Build the saucy base. Pour in the chopped tomatoes and the remaining beef stock. Stir everything together, scraping the bottom of the pan to release any final flavourful bits. Return the browned beef to the pan. Season with a good pinch of salt and pepper. Bring the mixture to a gentle simmer—you want lazy, burbling bubbles, not a frantic boil.
- Add the rice and let it steam. Sprinkle the rinsed rice evenly over the top of the saucy beef mixture. Do not stir it in yet. Press it down gently with the back of your spoon so it is mostly submerged. Cover the pan with a tight-fitting lid. Reduce the heat to low and let it cook undisturbed for 20 minutes. Listen for a soft, rhythmic simmer. Do not lift the lid—you’ll release the steam needed to cook the rice.
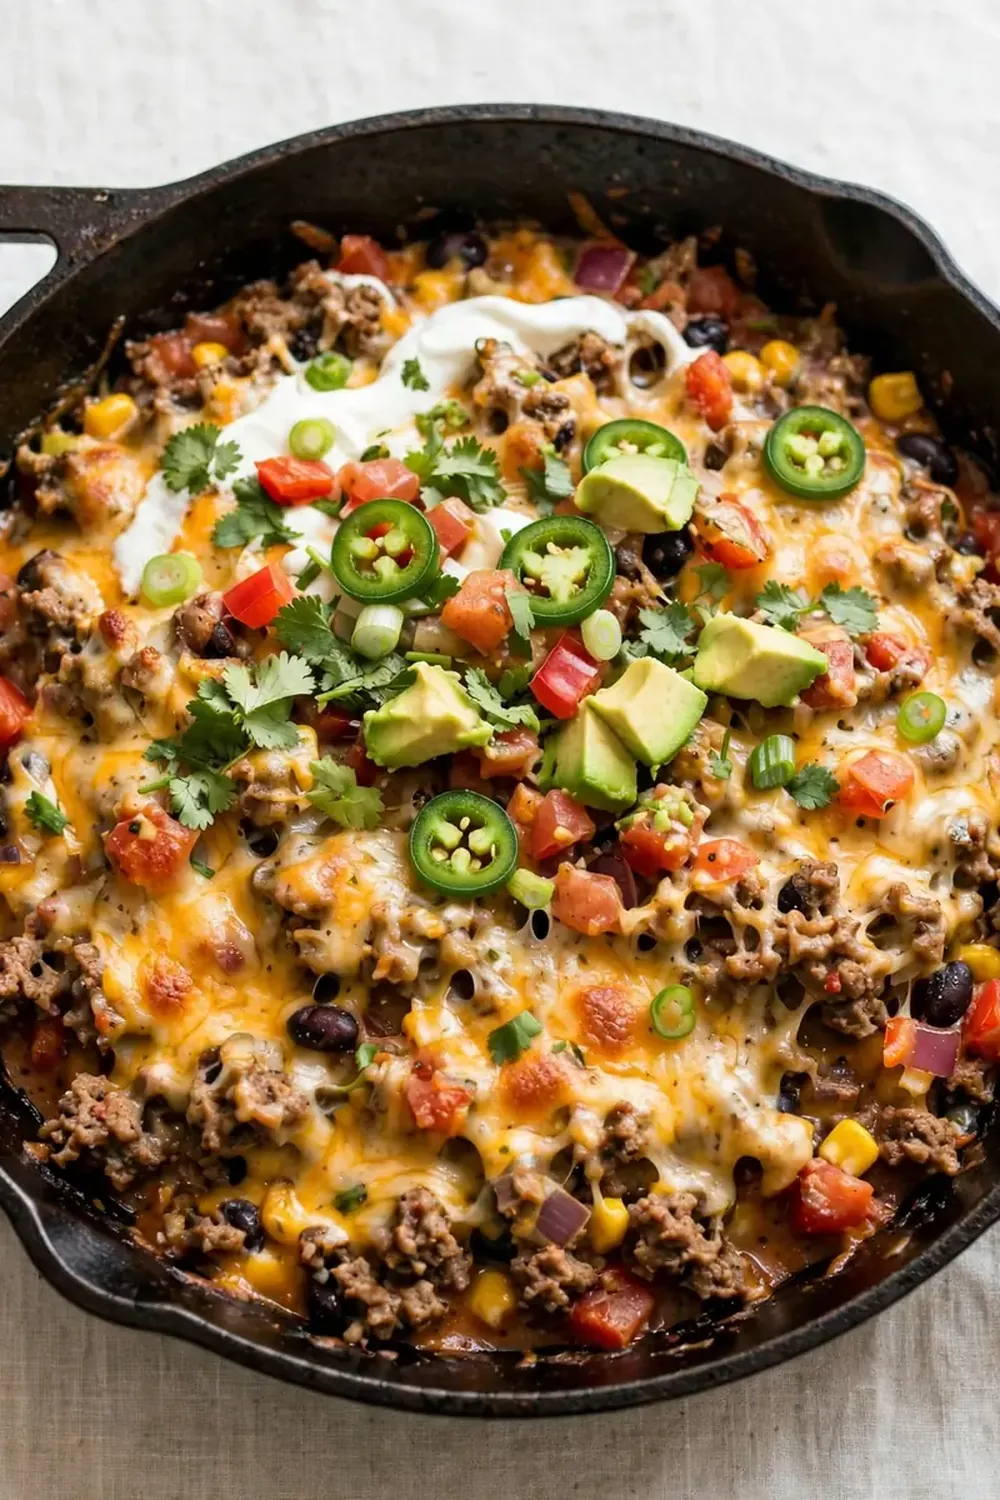
- Create the golden cheese lid. After 20 minutes, remove the lid. The rice should be tender and the liquid mostly absorbed. The surface will look slightly steamy and wet. Taste a grain of rice—it should be just cooked. If it is still chalky in the centre, add a splash more stock, replace the lid, and cook for another 5 minutes. Once the rice is perfect, scatter the grated cheddar cheese evenly over the entire surface of the skillet.
- Melt and brown to perfection. Replace the lid for one minute to encourage the cheese to begin melting. Then, remove the lid and switch the heat off. The residual heat will continue to melt the cheese into a blanket. For a bubbly, golden top, you can pop the pan under a hot grill for 2-3 minutes. Watch it carefully—you want patches of golden brown, not burnt. Scatter over the fresh coriander just before serving.
Tips From My Kitchen
- Don’t rush the browning. I stumbled upon this combination by accident, and it’s been a hit ever since, but the key was learning to let the beef sit in the pan. If you stir it constantly, it steams rather than browns, and you lose that deep, savoury foundation. Give it space and time to develop a crust.
- Rinse your rice until the water is clear. This is the single most important step for a non-stodgy result. The cloudy water is loose starch. If you don’t wash it off, the rice will release it into the sauce, creating a porridge-like texture instead of distinct, fluffy grains.
- Use a heavy-bottomed pan. A cheap, thin pan will have hot spots that burn the bottom before the rice on top is cooked. A heavy skillet or a good-quality non-stick pan distributes heat evenly, ensuring the rice cooks uniformly and the cheese melts without scorching.
- Resist the urge to stir after adding the rice. Once the rice is scattered on top and you’ve put the lid on, leave it alone. Stirring will release the starch from the rice and break the grains, turning your beautiful skillet into mush. Trust the steam to do its work.
- Let it rest for five minutes off the heat. After the cheese is melted and bubbly, slide the pan off the heat and let it sit for 5 minutes before serving. This allows the juices to settle back into the rice, the cheese to set slightly so it doesn’t slide off in one sheet, and the flavours to harmonise.
- Grate your own cheese. Pre-grated cheese is coated in anti-caking agents like potato starch or cellulose, which prevent it from melting into a smooth, cohesive blanket. Grating a block of cheddar yourself gives you a superior, creamy melt every single time.
Equipment You’ll Need
- Large frying pan or skillet (about 30cm wide) with a tight-fitting lid
- Sharp knife and cutting board
- Mixing bowls (for holding ingredients)
- Wooden spoon or spatula
- Fine-mesh sieve (for rinsing the rice)
- Box grater (for the cheese)
Common Mistakes to Avoid
- Overcrowding the pan: If you use too much rice or too much liquid, the pan becomes overcrowded and the rice will steam unevenly, leading to a mushy top and a burnt bottom. Stick strictly to the measurements provided, and ensure your pan is large enough to hold everything with a little space to spare.
- Wrong temperature: Cooking the rice on too high a heat will boil the liquid away before the grains have a chance to absorb it, leaving you with crunchy, uncooked rice. Conversely, too low a heat won’t generate enough steam to cook it through. A gentle, low simmer is the sweet spot—you should hear a soft, consistent bubbling, not a frantic hiss.
- Skipping the rest time: It is incredibly tempting to dig in the moment the cheese has melted, but skipping the rest time means the dish will be runny and the structure will collapse on the plate. Those five minutes allow the starches to stabilise, making for a much more satisfying, cohesive serving.
Delicious Variations to Try
- Spicy Version: For those who like a real kick, add a finely chopped fresh red chilli (seeds and all) along with the garlic and peppers. You can also stir in a teaspoon of chipotle paste with the tomato purée for a smoky, lingering heat that builds beautifully.
- Vegetarian/Vegan Option: Swap the beef mince for a plant-based mince or 400g of cooked, drained black beans. Use a vegan cheddar-style block that melts well. The beans add a lovely creamy texture, and the spices will coat them perfectly. Ensure your stock is vegetable-based.
- Different Protein: Ground turkey or chicken work wonderfully here, though they are leaner. Add an extra tablespoon of olive oil to the pan when cooking them to prevent dryness. You could also use shredded, cooked chicken stirred in at the end, just before the cheese goes on, for a quick weeknight version.
What to Serve With One-Pan Cheesy Beef Taco Skillet
- A simple side salad with a sharp lime and coriander dressing to cut through the richness.
- A bowl of cool, thick sour cream or Greek yoghurt for dipping and dolloping.
- A pile of warm, soft tortillas to scoop up every last bit of cheesy goodness.
- A generous spoonful of Homemade Queso Dip on the side for an extra layer of indulgent, creamy cheese.
Still hungry for ideas? You might also love One Pan Cheesy Meat Potato Skillet, Marry Me Chicken Orzo One Pan from our sister kitchens.
Frequently Asked Questions
One-Pan Cheesy Beef Taco Skillet
Ingredients
Method
-
Brown the beef with patience. Set your large frying pan or skillet over a medium-high heat and add the olive oil. Once it shimmers, add the beef mince. Break it up with a wooden spoon and let it sit, undisturbed, for a good 3-4 minutes. You want to hear a fierce sizzle and see the underside turn a deep, nutty brown. Only then should you stir. This browning, called the Maillard reaction, is the bedrock of all the flavour to come. Stir and cook until no pink remains, then tip the mince into a bowl and set aside.
-
Sweat the aromatics until translucent. Lower the heat to medium. In the same pan, with the residual fat, add the diced onion. Stir it around, scraping up any browned bits from the bottom. Cook for 5-7 minutes, until the onion turns soft, glossy, and translucent. The smell will shift from raw to sweet and savoury. Add the garlic and both bell peppers, and cook for another 3 minutes. The peppers should soften but still hold a little resistance, their colour brightening.
-
Bloom the spices in the pan. Add the tomato purée, ground cumin, smoked paprika, dried oregano, and chilli flakes if using. Stir constantly for one full minute. This step is non-negotiable. You will smell the spices ‘waking up’—the aroma will become potent, earthy, and intoxicating. If the paste begins to stick, add a splash of the beef stock to keep it moving.
-
Build the saucy base. Pour in the chopped tomatoes and the remaining beef stock. Stir everything together, scraping the bottom of the pan to release any final flavourful bits. Return the browned beef to the pan. Season with a good pinch of salt and pepper. Bring the mixture to a gentle simmer—you want lazy, burbling bubbles, not a frantic boil.
-
Add the rice and let it steam. Sprinkle the rinsed rice evenly over the top of the saucy beef mixture. Do not stir it in yet. Press it down gently with the back of your spoon so it is mostly submerged. Cover the pan with a tight-fitting lid. Reduce the heat to low and let it cook undisturbed for 20 minutes. Listen for a soft, rhythmic simmer. Do not lift the lid—you’ll release the steam needed to cook the rice.
-
Create the golden cheese lid. After 20 minutes, remove the lid. The rice should be tender and the liquid mostly absorbed. The surface will look slightly steamy and wet. Taste a grain of rice—it should be just cooked. If it is still chalky in the centre, add a splash more stock, replace the lid, and cook for another 5 minutes. Once the rice is perfect, scatter the grated cheddar cheese evenly over the entire surface of the skillet.
-
Melt and brown to perfection. Replace the lid for one minute to encourage the cheese to begin melting. Then, remove the lid and switch the heat off. The residual heat will continue to melt the cheese into a blanket. For a bubbly, golden top, you can pop the pan under a hot grill for 2-3 minutes. Watch it carefully—you want patches of golden brown, not burnt. Scatter over the fresh coriander just before serving.
Notes
I hope this skillet becomes as much of a weekend ritual for you as it is for me. It’s more than just dinner; it’s a way to slow down, to listen to the sounds of a happy kitchen, and to serve something truly heartfelt. If you give it a go, I’d love to hear how you got on—drop a comment below and tell me about your own cosy cooking moments. For another deeply satisfying one-pan meal, you might also enjoy my Classic Chicken Pot Pie, or if you’re in the mood for something lighter from the sea, these Shrimp Tacos With Avocado Cream are a delight.